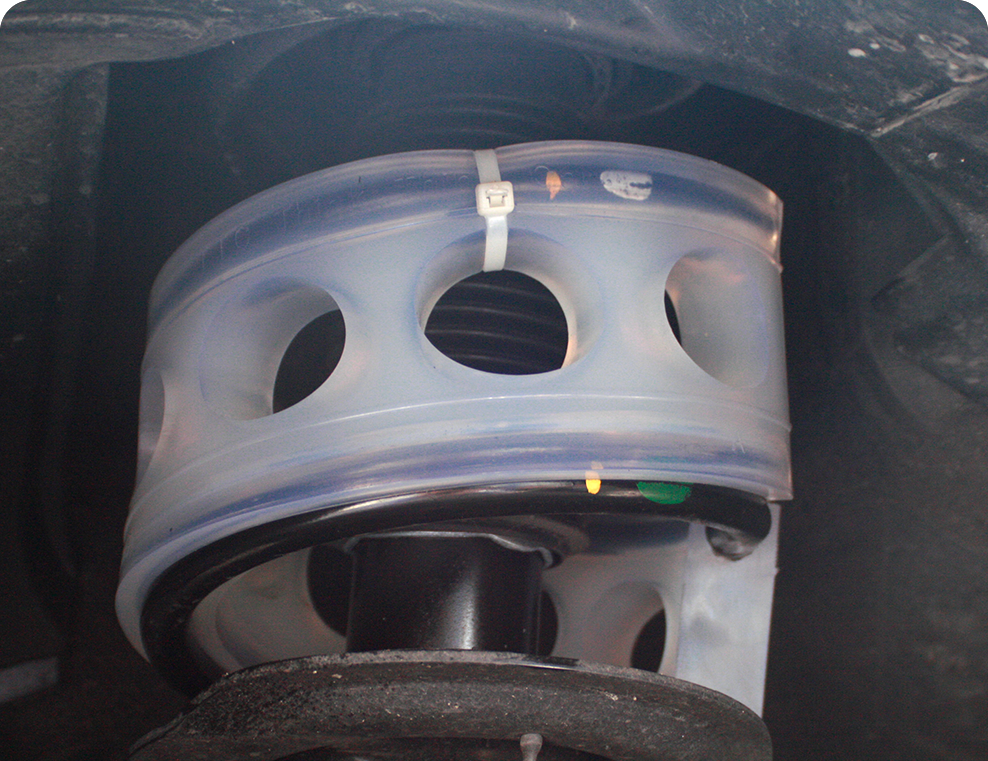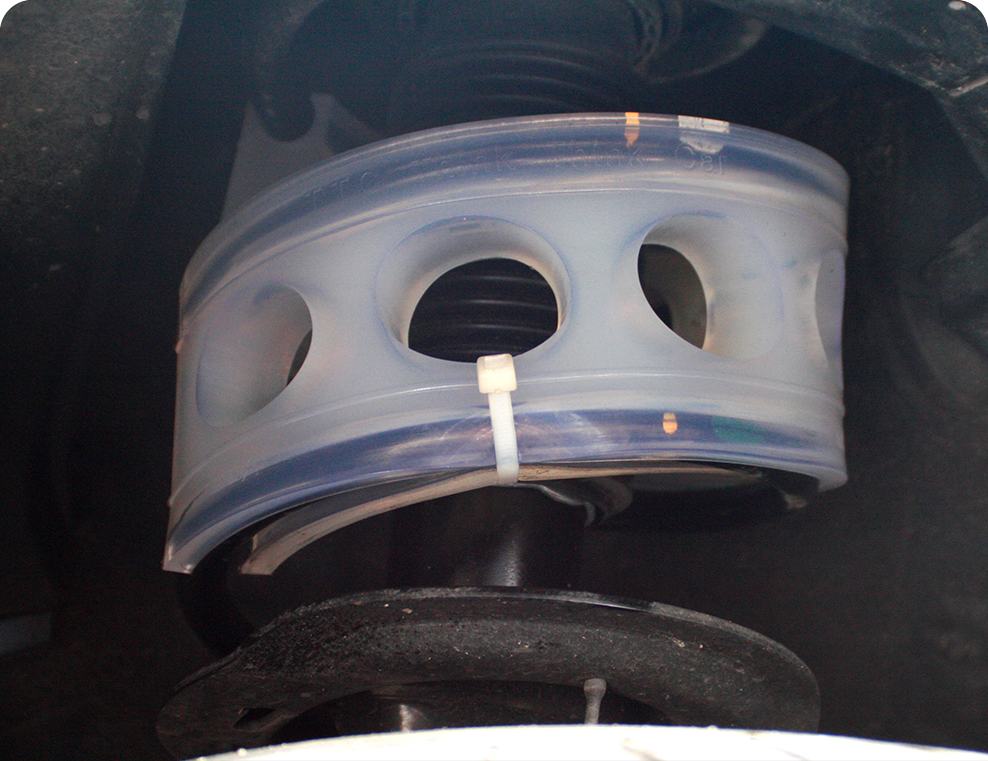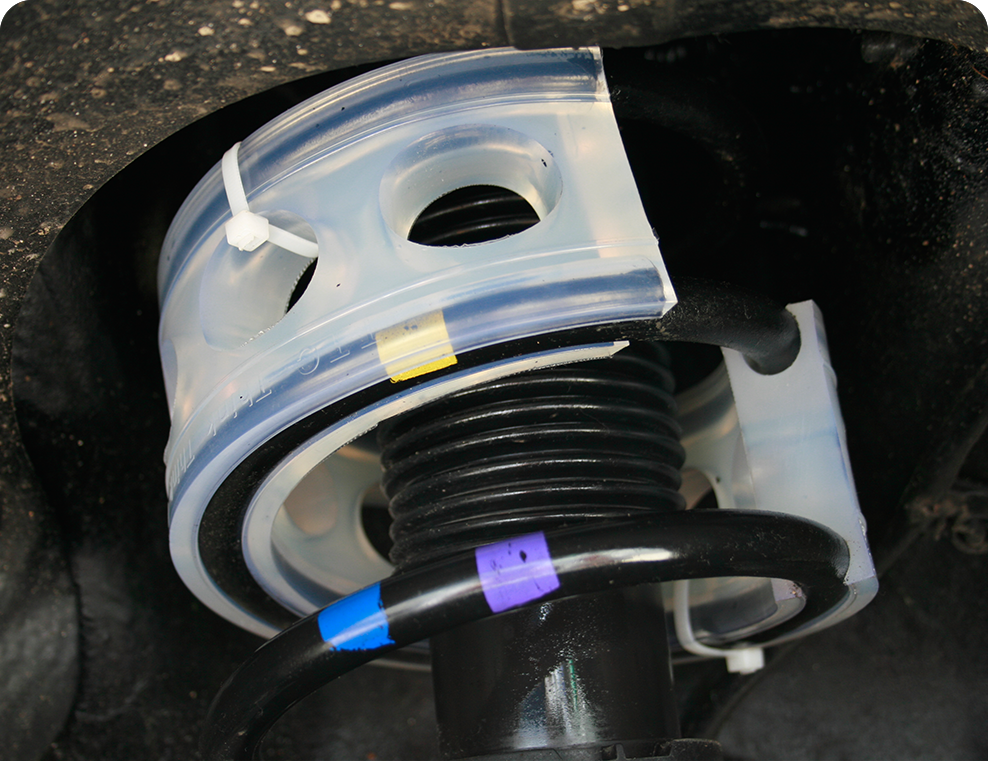

You should loosely tie the coil spring and the cushion buffer using cable tie for the following types of cushion buffer: K, S, A, & B. At this time, be careful not to bend the cushion buffer. (It is not applicable for the following types: C, D, E, F)

 |
1. Preparing MaterialsPrepare cushion buffer, jack, soap water or WD (Water Displacement), and cable tie (if necessary.) |
 |
2. Lifting the vehicleLift up the vehicle body using a jack or a lift until the vehicle's wheels are off the ground. |
 |
3. Checking the condition of coil springThe coil spring should be loose. |
 |
4. Cleaning the coil spring before installing the cushion bufferSpray soap water or WD on the coil spring for easy installation. This step makes the surface of the coil spring smooth. |
 |
5. Installing the cushion buffer on the coil springInstall the cushion buffer on the coil spring. It will be easy if you smoothly rotate the cushion buffer when installing. |
 |
6. Checking after the installationMake sure the grooves of the cushion buffer are well interlocked with the coil spring. If the type of cushion buffer needs to be tied, fasten the cushion buffer and the coil spring with the cable tie. |

- your car should be parked on a flat ground, - select a safe place for installation where other cars do not run around, - your vehicle engine should be turned off for safety, - make sure that your jack works properly before you install the cushion buffer
Checking the condition of the cushion buffer after installingCheck if the coil springs are well interlocked into the grooves of the cushion buffer. Otherwise, it can be an improper installation. |
Checking the installing location of the cushion bufferWe recommend that the position of the cushion buffer be in the middle of the coil spring. In general case, the cushion buffer should not be installed on the very top or bottom part of the coil spring. |
Checking the size of cushion bufferIf you install a cushion buffer that does not fit to the coil spring, the life span of the cushion buffer may be shortened. Please refer to the standard size table of cushion buffer by types before you purchase and install a cushion buffer. Or contact our customer support center. |

You should loosely tie the coil spring and the cushion buffer using the cable tie for the following types of cushion buffer: K, S, A, B. The purpose of tying them is to prevent a detachment of the cushion buffer when the vehicle body is lifted. There is no need to tie them only for driving the vehicle.
 |
1. Tying the upper partAs seen in the picture, tie the coil spring to the second hole from the right edge of the cushion buffer with the cable tie. |
 |
2. Tying the bottom partAs seen in the picture, tie the coil spring to the second hole from the left edge of the cushion buffer with the cable tie. |
 |
3. Readjusting the position of the cushion bufferReadjust the cushion buffer to the right position after tying the coil spring and the cushion buffer; then, wrap up the work. |

Refer to the following safety rules when you install the cushion buffer on your own. Please always be aware of safety while installing it.
Parking on a flat groundWhen you install the cushion buffer: You should park your car on a flat ground where other cars do not run around. |
Turning off the engineWhen you install the cushion buffer: You should turn off your vehicle engine. It is dangerous to install it while the engine is running. |
Shifting the gear to 'park'When you install the cushion buffer: You should shift the gear to "park." (if your vehicle has an automatic transmission) |
Setting parking brakeWhen you install the cushion buffer, the parking brake should be set. |
Having all passenger and load stay out of the vehicleWhen you install the cushion buffer, your vehicle should not have any passenger or load. |
Securing the safety around the installation siteWhen you install the cushion buffer, you should select a place where other vehicles are not running around. |